
The taper fade mullet is back—and it’s edgier than ever. Once a retro staple, this style is now a modern favourite among trendsetters and barbers alike. If you’re looking to master the art of this unique mullet haircut, this step-by-step guide will walk you through everything you need, from tools and sectioning to finishing with precision. Whether you’re working with curly hair, straight hair, or even adding a mullet with beard, we’ve got you covered.
What Is a Taper Fade Mullet?
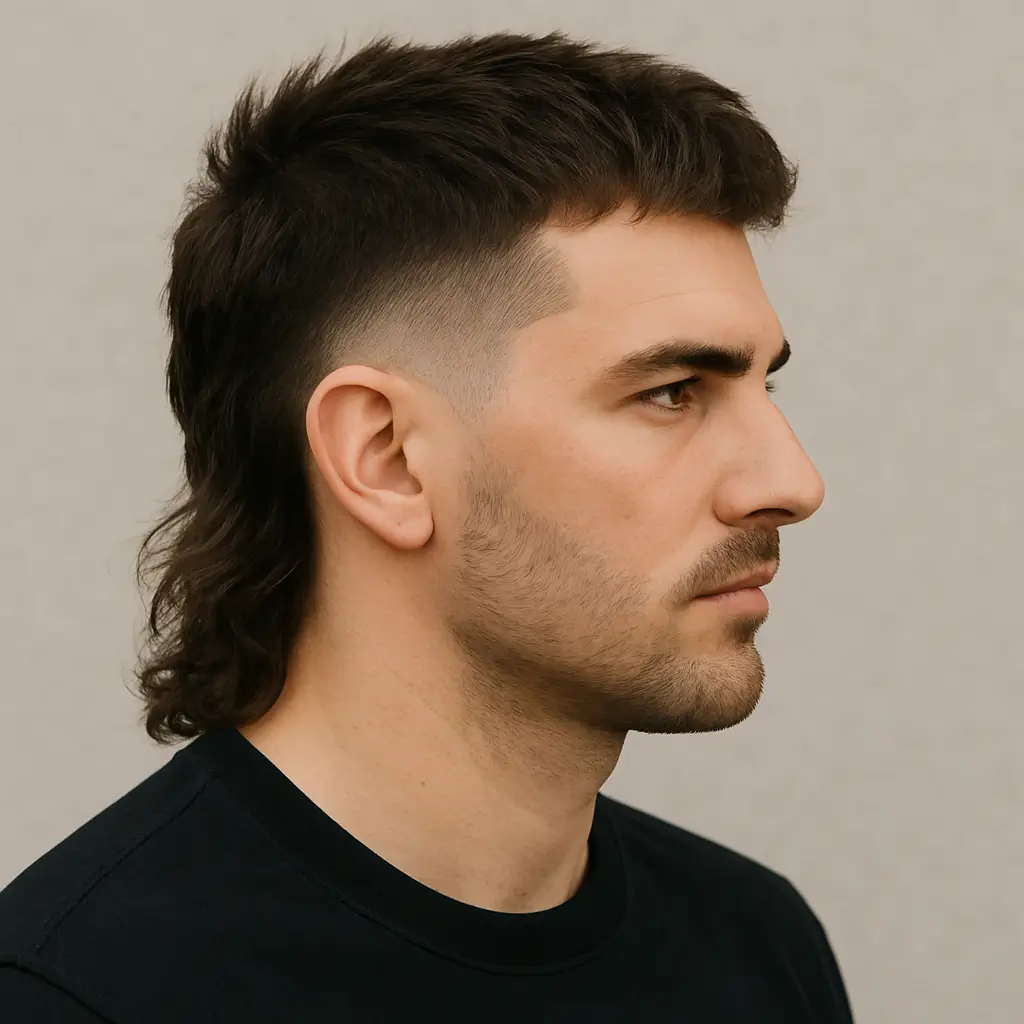
A taper fade mullet combines the clean look of a fade haircut with the boldness of the classic mullet. The taper fade shortens the sides and back progressively while leaving length at the nape. It’s a mullet transformation that suits anyone wanting something modern yet nostalgic.
It’s perfect for guys who like versatility—you can keep it textured, go low taper for a softer finish, or dial it up with a high taper mullet style that screams confidence.
Tools You’ll Need
Before diving into the cutting process, gather the right tools. Here’s what you’ll need:
- Clippers with adjustable guards
- Trimmers or edgers
- Barber shears
- Comb
- Sectioning clips
- Spray bottle with water
- Styling product (e.g. matte pomade or cream)
Step 1: Section the Hair
Start by creating clean sections. This is key to achieving a professional-looking fade mullet. Use your comb to divide the hair into three zones:
- Top (leave the most length here)
- Sides (prepare for the taper fade)
- Back (the classic mullet length)
Tip: Use clips to keep sections tidy. For DIY taper fade mullet cuts, a hand mirror will help you see the back better.
Step 2: Begin the Taper Fade
Start with the taper. Decide between a low taper fade mullet or a high taper mullet style depending on your face shape and desired contrast.
- Use the #1 guard on your clippers and begin at the sideburn.
- Gradually blend into a #2 or #3 guard as you move upward.
- Use the lever to soften the fade by opening/closing it between levels.
- For the neckline, taper using the same method, moving down to a bald or skin level with your trimmers.
The idea is to create a smooth transition—barber mullet fade guide rule: never leave harsh lines.
Step 3: Cut the Top
With the sides tapered, it’s time to focus on the top. This section defines your overall mullet style.
- Comb the top hair forward and trim to your desired length.
- For a textured mullet tutorial, point-cut the ends to create natural movement.
- If you’re going for a modern mullet haircut, leave it longer and choppier at the crown.
Step 4: Shape the Mullet
This is where the mullet comes alive. The length at the back should remain untouched until now.
- Comb the back section straight down.
- Use shears to shape it—shorter at the crown, longer toward the neck.
- Blend it into the top and sides with scissor-over-comb techniques.
Pro tip: For a curly hair taper mullet, shape it while it’s slightly damp to control shrinkage.
Step 5: Detail and Clean Up
Now for the polish. Use your trimmers to edge around the ears, sideburns, and neckline. This makes a fade haircut look crisp and refined.
If adding a mullet with beard, taper the sideburns into the beard for a seamless blend.
A DIY taper fade mullet might take some practice, but this final detailing step makes all the difference between amateur and expert.
Step 6: Style It Up
Styling is essential to make your cut stand out.
- For a fade mullet with a textured look, apply matte paste and tousle the top.
- Curly hair? Use curl cream to define the back section.
- Want a clean finish? Blow-dry and brush the top back with a light hold product.
Maintenance Tips for Taper Fade Mullet
A fresh tapered mullet won’t stay sharp forever. Here’s how to keep it looking great:
- Trim the taper every 2–3 weeks to maintain clean lines.
- Wash and condition regularly to avoid product build-up.
- Use a wide-tooth comb for curly taper mullets to keep shape without frizz.
- Re-style daily with a light hold product to enhance shape and texture.
Popular Variations to Try
Once you master the basics, experiment with different mullet fade styles:
- Low Taper Fade Mullet: Subtle and suitable for casual looks.
- High Taper Fade Mullet: Edgy and modern with dramatic contrast.
- Textured Mullet: Works well on thick or wavy hair.
- Barber-Crafted Mullet Fade: Great for high-detail, precision styling.
Who Should Try This Style?
The taper fade mullet suits many hair types and personalities. It works particularly well for:
- Men with thick hair who want structure.
- Anyone with straight hair mullet fade goals.
- Those looking for a mullet haircut with a modern twist.
- Guys who love statement looks or streetwear aesthetics.
It might not be ideal for super-fine hair unless product and volume are used creatively.
Final Thoughts
The taper fade mullet is more than just a throwback—it’s a bold, expressive style that blends sharp edges with relaxed flow. Whether you’re aiming for a DIY taper fade mullet or heading to the barber for a fade mullet haircut, this tutorial provides everything you need to get it right.
Don’t be afraid to customise it: try different taper heights, add a beard, or play with texture to find your signature look. With regular maintenance and a bit of styling effort, you’ll have a mullet style that’s both nostalgic and on-trend.